Introduction to CUDA for C++
“As you know, the G in GPU originally stood for graphics. And today, we do much, much more than graphics. We changed the mission. I just never changed the name!” – Jensen Huang
Link to my Gitlab repository for the files for this lesson: mday299/keypuncher/tree/main/CUDA/Intro.
How to contact me mailto:mday299@pm.me.
Intro
Compute Unified Device Architecture (CUDA) has become all the rage. I have recently had the opportunity to work with it. According to Wikipedia, CUDA is:
… written in the C programming language, but is designed to work with other programming languages including C++, Fortran, Python and Julia. This accessibility makes it easier for specialists in parallel programming to use GPU resources, in contrast to prior APIs like Direct3D and OpenGL, which require advanced skills in graphics programming. CUDA-powered GPUs support programming frameworks such as OpenMP, OpenACC and OpenCL.
Despite this advertising, I still think CUDA has a hefty learning curve. This article is designed to alleviate some of that pain.
This tutorial is in C++, on an NVIDIA GPU. I'm using a Quadro P620, NVIDIA SMI-580 AND a second machine with NVIDIA GeForce MX250, NVIDIA-SMI 580, Ubuntu 24.04 or 26.04, and Docker-CE.
Article Includes
- What CUDA is good at.
- Some disadvantages of CUDA.
- Installation of CUDA on Ubuntu 24.04
- A Simple Docker Example
- A Simple Native Ubuntu Example
- Some CUDA Alternatives
Where CUDA Shines
- Performance boost: CUDA unlocks the parallelism of NVIDIA GPUs!
- Mature: CUDA has a rich set of libraries (cuBLAS, cuDNN, Thrust, etc.), profiling tools via Nsight, and integrations with frameworks like TensorFlow and PyTorch.
- Industry adoption: CUDA is widely used in academia, research, and industry, meaning abundant documentation, tutorials, and community support.
- Easy to use (not learn!): Developers can write GPU kernels in C/C++ with extensions. Extensions include
- Kernel qualifiers include
__global__Marks a function as a GPU kernel callable from the host (CPU).__device__Marks a function that runs only on the GPU, callable from other GPU code.
- Kernel qualifiers include
- Thread and block indexing
- Built-in variables like
threadIdx,blockIdx,blockDim,gridDimlet you calculate each thread’s unique ID in the grid.
- Built-in variables like
- Memory space specifiers include
__shared__Shared memory (per block).
__managed__Unified memory accessible by both CPU and GPU.- Device intrinsics
- Functions like
__syncthreads()__syncthreads() - and warp shuffle operations (
__shfl_xor_sync). See what-is-warp-shuffling-in-cuda-and-why-is-it-useful.
- Functions like
- Math and utility libraries
- CUDA provides optimized math functions (
__sinf,__cosf, etc.), see CUDA mathematical-functions and vector types, see cuda-math-api for GPU-friendly computation.
- CUDA provides optimized math functions (
Disadvantages of CUDA
- Vendor lock in and Licensing: CUDA only works on NVIDIA GPUs. If you switch to AMD or Intel GPUs, your CUDA code won’t run. NVIDIA tightly controls CUDA’s roadmap, which can limit flexibility for open-source projects or companies seeking cross-platform solutions.
- Portability issues: Competing standards like OpenCL, SYCL, or Vulkan, compute are cross-vendor, but CUDA is proprietary and tied to NVIDIA hardware.
- Difficult to learn: While easier than raw GPU assembly, (see what-a-program-assembly-that-uses-a-gpu-even-look-like), CUDA still requires understanding of GPU architecture, memory hierarchies, and parallel programming concepts.
- Resource overhead: CUDA applications can demand significant GPU memory and power. This may also be classified as an advantage, depending on how deep your pockets are.
Installation on Ubuntu
You need an NVIDIA GPU in your machine before you install! Any other GPU (Intel, AMD, etc.) will not work.
Base Install
Verify you’ve got the base build-essential environment:
sudo apt update
sudo apt install build-essential gcc g++ cmake git pkg-config ninja-build libssl-dev libxml2-dev libncurses-dev
CUDA Infrastructure
Step 1: Identify your GPU driver:
lspci | grep -i nvidia
This shows which NVIDIA GPU(s) are installed.
Step 2: Check compatibility
Consult the official CUDA Compatibility Matrix to see which CUDA versions your driver supports.
In my case, the driver version 580 is technically compatible up through CUDA 13. However, Pascal GPUs only have full native support (without relying on JIT compilation) up to CUDA 11.8. Beyond that, CUDA falls back to PTX JIT compilation, which I want to avoid. See Just‑in‑time compilation and NVIDIA’s JIT compilation guide field-guide/jit-compilation.
Step 3: Choose the right architecture
On my machines, Pascal support is limited to sm_61. Native compilation for this architecture ended with CUDA 11.8, so that’s the version I'm installing You most likely have a different GPU architecture, so check your own compatibility!
Step 4: Verify installation
Run:
nvidia-smi
This confirms that your driver and CUDA toolkit are installed and working correctly.
Simple Docker Example
Instructions for Docker are left out for brevity. See the link: nvidiacontainer instructions. or the textbook: learning.oreilly.com/Chapter_2, or my general Docker instructions for details docker-images-and-containers or containerization-introduction. This article isn’t intended to be a docker tutorial.
I’ll be using Docker-CE in this tutorial. If you want to use docker.io then see this guide: how to install docker.io on Ubuntu.
Configuring Docker
sudo apt-get install -y --no-install-recommends ca-certificates curl gnupg2

curl -fsSLhttps://nvidia.github.io/libnvidia-container/gpgkey| sudo gpg --dearmor -o /usr/share/keyrings/nvidia-container-toolkit-keyring.gpg

curl -s -Lhttps://nvidia.github.io/libnvidia-container/stable/deb/nvidia-container-toolkit.list| sed 's#deb https://#deb [signed-by=/usr/share/keyrings/nvidia-container-toolkit-keyring.gpg] https://#g' |
    sudo tee /etc/apt/sources.list.d/nvidia-container-toolkit.list

sudo apt-get update

sudo apt-get install -y nvidia-container-toolkit

sudo nvidia-ctk runtime configure –runtime=docker

sudo systemctl restart docker

sudo usermod -aG docker $USER
Log out and log back in or reboot for the permissions change to take effect!
Next,
docker pull nvidia/cuda:11.8.0-devel-ubuntu20.04
Depending on Internet speed, this can take a while to download the first time.
Now try dropping into the container and playing around.
docker run --rm -it --runtime=nvidia --gpus all \
   -v $(pwd):/workspace \
   nvidia/cuda:11.8.0-devel-ubuntu20.04 bash
Once inside the container, verify GPU visibility:
root@ce9fbfda9876:/# nvidia-smi
and verify the CUDA libs are there:
ls /usr/local/cuda/lib64
If everything is A-OK you should be ready to insert your code.
Example Code
In the editor of your choice create a CUDA file such as vector_add.cu:
#include <iostream>
#include <cuda_runtime.h> //cudaMalloc, cudaMemcpy, etc.

//CUDA kernel: add two vectors element-wise
//global marks this as a CUDA kernel (runs on the GPU, callable from the CPU).
__global__ void vectorAdd(const int *a, const int *b, int *c, int n) {
    //blockIdx.x: index of the current block in the grid.
    //blockDim.x: number of threads per block.
    //threadIdx.x: index of the current thread inside its block.
    //Together, i = blockIdx.x * blockDim.x + threadIdx.x computes a global thread index.
    int i = blockIdx.x * blockDim.x + threadIdx.x;

    //The if (i < n) guard ensures threads beyond the vector length don’t
    // access memory out of bounds.
    if (i < n) {
        //Each thread computes one element of the sum:
        c[i] = a[i] + b[i];
    }
}

int main() {
    const int N = 16;
    size_t size = N * sizeof(int);

    //Host vectors
    //Allocates three arrays on the host (CPU): input vectors h_a, h_b, and output vector h_c.
    //Initializes h_a with values 0..15.
    //Initializes h_b with multiples of 10 (0, 10, 20, …, 150).
    int h_a[N], h_b[N], h_c[N];

    for (int i = 0; i < N; i++) {
        h_a[i] = i;
        h_b[i] = i * 10;
    }

    //Device vectors
    //Declares pointers for arrays on the device (GPU).
    int *d_a, *d_b, *d_c;

    //Allocates GPU memory for each vector using cudaMalloc.
    cudaMalloc((void**)&d_a, size);
    cudaMalloc((void**)&d_b, size);
    cudaMalloc((void**)&d_c, size);

    //Copies initialized data from host arrays (h_a, h_b) into device memory (d_a, d_b).
    //Direction flag cudaMemcpyHostToDevice specifies the transfer direction.
    cudaMemcpy(d_a, h_a, size, cudaMemcpyHostToDevice);
    cudaMemcpy(d_b, h_b, size, cudaMemcpyHostToDevice);

    //Launch kernel with enough threads
    int threadsPerBlock = 8; //each block has 8 threads

    //Ensures enough blocks to cover all 16 elements.
    int blocksPerGrid = (N + threadsPerBlock - 1) / threadsPerBlock;

    //Launch kernel call
    vectorAdd<<<blocksPerGrid, threadsPerBlock>>>(d_a, d_b, d_c, N);

    //waits until all GPU work finishes before continuing.
    cudaDeviceSynchronize();

    // handle misaligned CUDA runtimes gracefully
    cudaError_t err = cudaGetLastError();
    if (err != cudaSuccess) {
        std::cerr << "CUDA kernel error: " << cudaGetErrorString(err) << std::endl;
    }

    //Copies the results from GPU memory (d_c) back into the host array (h_c).
    cudaMemcpy(h_c, d_c, size, cudaMemcpyDeviceToHost);

    // Print results
    for (int i = 0; i < N; i++) {
        std::cout << h_a[i] << " + " << h_b[i] << " = " << h_c[i] << std::endl;
    }

    //Frees GPU memory to avoid leaks.
    cudaFree(d_a);
    cudaFree(d_b);
    cudaFree(d_c);

    return 0;
}
Once the code in entered, change into the workspace directory and compile and run the code:
cd workspace/
nvcc vector_add.cu
./a.out
Which should produce this output:
0 + 0 = 0
1 + 10 = 11
2 + 20 = 22
3 + 30 = 33
4 + 40 = 44
5 + 50 = 55
6 + 60 = 66
7 + 70 = 77
8 + 80 = 88
9 + 90 = 99
10 + 100 = 110
11 + 110 = 121
12 + 120 = 132
13 + 130 = 143
14 + 140 = 154
15 + 150 = 165
Simple Native Example
Good news! If you have done everything correctly with Docker you SHOULD be able to just do this from OUTSIDE the Docker container:
nvcc vector_add.cu
And it just works.
CUDA Alternatives
- Qualcomm Snapdragon: The main competitor to CUDA that I’ve run into is Snapdragon, see Qualcomm_Snapdragon and snapdragon/overview. Seems to be optimized for mobile apps, but I haven’t had much exposure to it.
- Vulkan compute: mentioned previously. Cross-vendor, explicit control, modern replacement for OpenGL.
- OpenCL: mentioned previously.
- SYCL: A modern C++ abstraction layer over OpenCL, part of oneAPI and OneAPI. With that comes vendor lock in to Intel.
- HIP (Heterogeneous-compute Interface for Portability): AMD’s CUDA-like API, see: amd-lab-notes-hipify-readme. Tied to AMD GPUs.
- DirectCompute: Microsoft’s DirectX API for GPU compute. Windows-only. DirectCompute and learn.microsoft.com.
- Metal Performance Shaders: Apple’s GPU compute framework. Metal_(API) and developer.apple.com.
Conclusion
That’s my introduction to the world of CUDA! Please comment or email if you feel so inclined.
Credits
CUDA website. https://developer.nvidia.com/cuda/toolkit
Google Colab: https://colab.research.google.com/
NVIDIA Container Toolkit (for containers such as Docker): https://github.com/NVIDIA/nvidia-container-toolkit
Docker Website: https://www.docker.com/
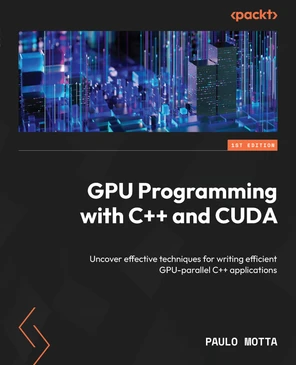
Textbook I used: GPU Programming with C++ and CUDA, PUBLISHED BY: Packt Publishing, date: August 2025:
https://learning.oreilly.com/library/view/gpu-programming-with/9781805124542/